How to Add Signatures to Documents Using CamScanner?
Since the digitalization era, most legal work is done online. This increases the need for online documentation and signatures. School forms, Job applications, and even residential agreements need your signatures. In such cases, digital signatures would be the headache to deal with.
You don’t have to go through the pain of printing and scanning pages. You can easily create digital signatures with the help of CamScanner. You don’t need to have any skills to use CamScanner. An easy-to-understand guide will be helpful for a beginner.
About CamScanner
CamScanner turns your phone into a portable scanner. You can scan documents, receipts, and anything with it. These scanned documents are then turned into PDFs, JPGs, etc. These can be later saved, edited, and shared.
The ability to add digital signatures to documents makes CamScanner a must-have tool for almost everyone. It also has features like editing, cropping, etc, which will simplify creating and handling digital documents. An easy-to-understand guide will be helpful for a beginner. Go through the steps and create digital signatures in seconds.
Types of Signatures
Here is a list of different kinds of signatures commonly used:
- Digital signatures: These are legally secured, encrypted signatures.
- Electronic signatures (E-signatures): Any kind of digitally made signature.
- Typed signature: Simply typed name in a specific font.
- Image-based signature: A scanned or photographed image of your handwritten signature.
Steps to Add Signatures to Documents
It is a very easy process, so follow the given steps to set up:
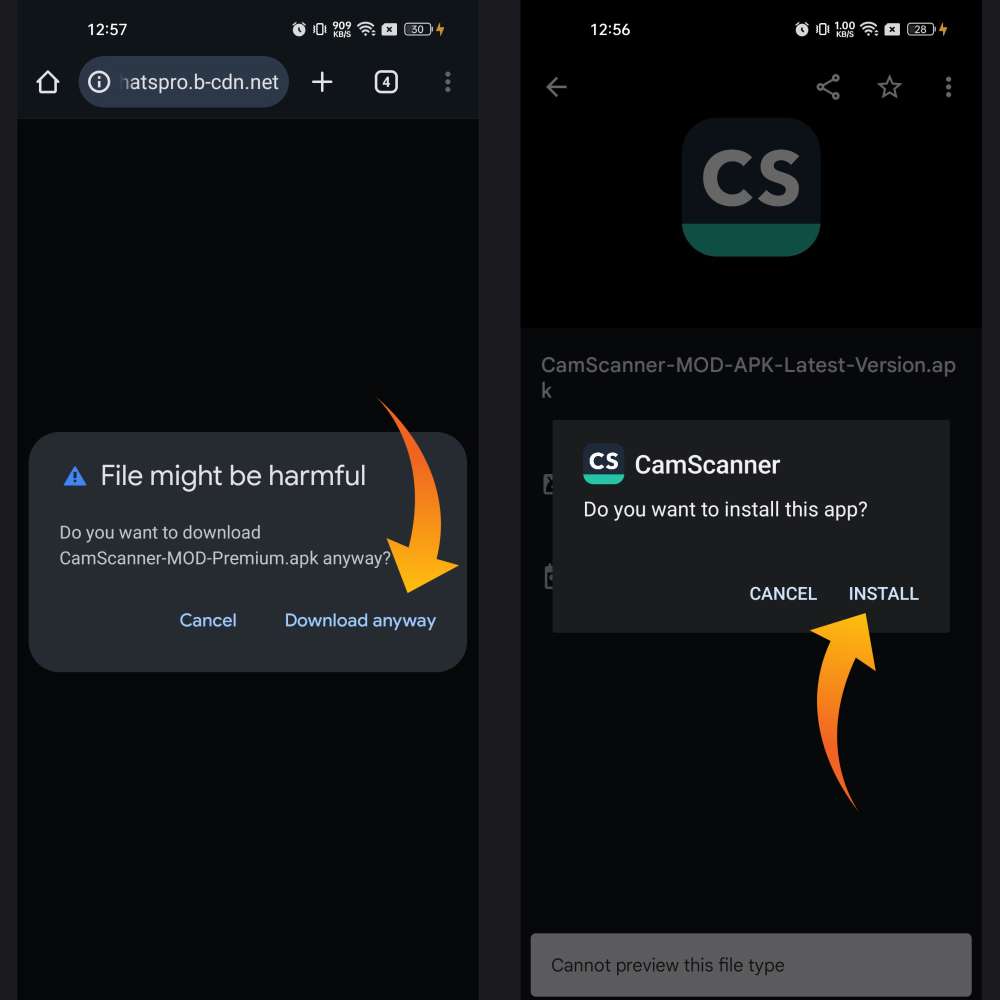
Step 1. Download and install the Latest CamScanner app
- Download the app. You can go to the Google Play Store or another App Store. Look for CamScanner and install it.
- Open the App and go through the basic features.
- You have to create an account to use the App. Use your email ID, phone number, or other available accounts.
- Create or log in to your account. CamScanner needs App Permissions to function.
- Thus, allow access to your phone camera, storage and files.
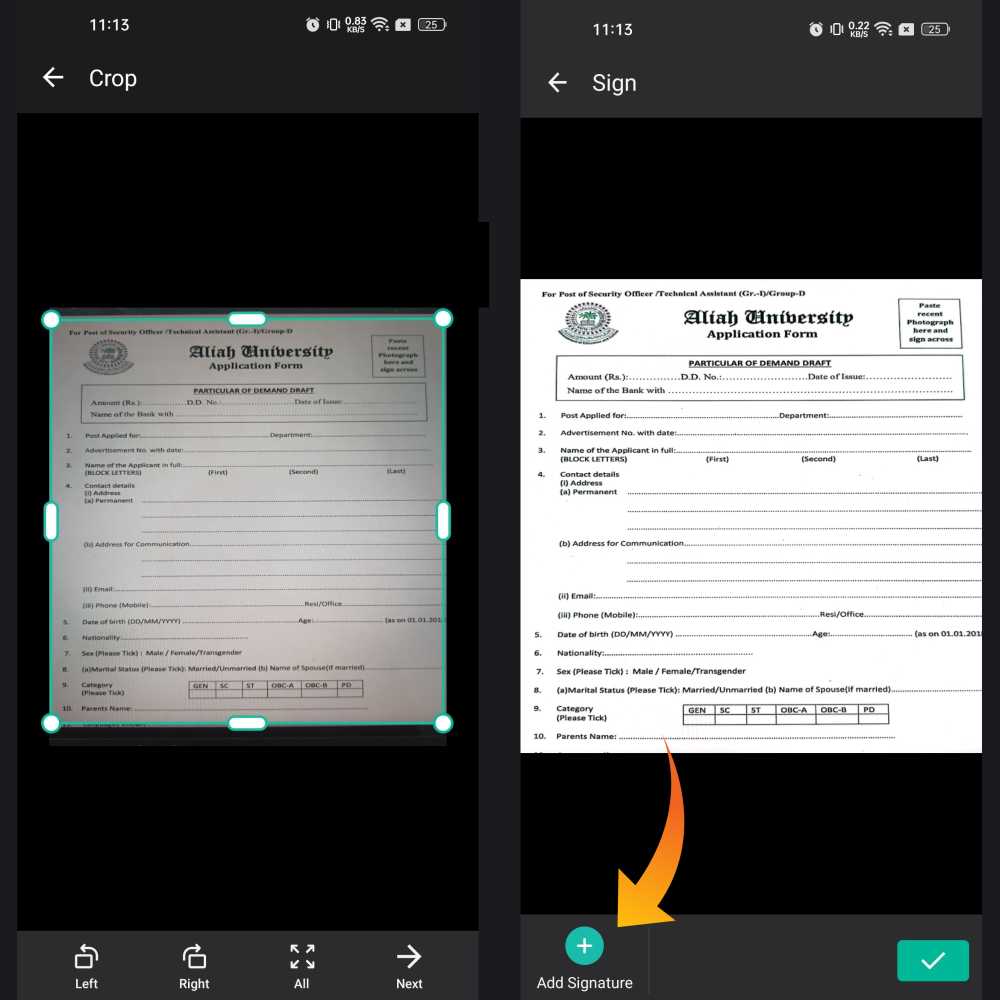
Step 2. Scan a Document
- Before creating digital signatures, set your documents in the CamScanner.
- Click on the camera icon to scan a document. The document should be clear and well-lit.
- CamScanner will automatically crop the image. The image will be enhanced for better quality.
- Select the Import option to access the saved documents.
- CamScanner has features that let you crop, sharpen, and rotate documents. It lets you adjust brightness and contrast.
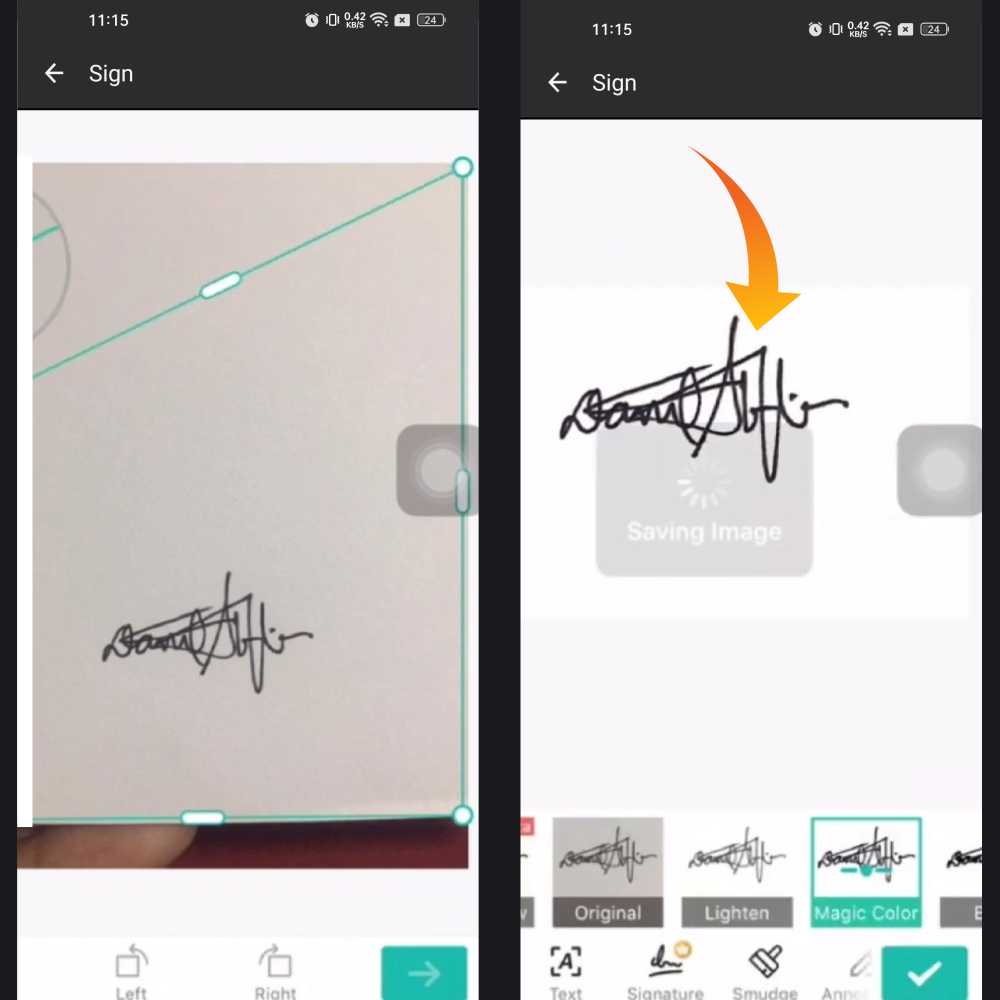
Step 3. Create Your Digital Signature
- Creating digital signatures on CamScanner is very easy.
- Ready your documents in CamScanner.
- Select the edit option and then select signature.
- Draw your signature on the screen. You can use either your fingers or a stylus.
- Erase the signature if needed and redo it.
- Save the document in the app. This way, you can reuse the digital signature on other documents. You don’t have to redraw it every time.
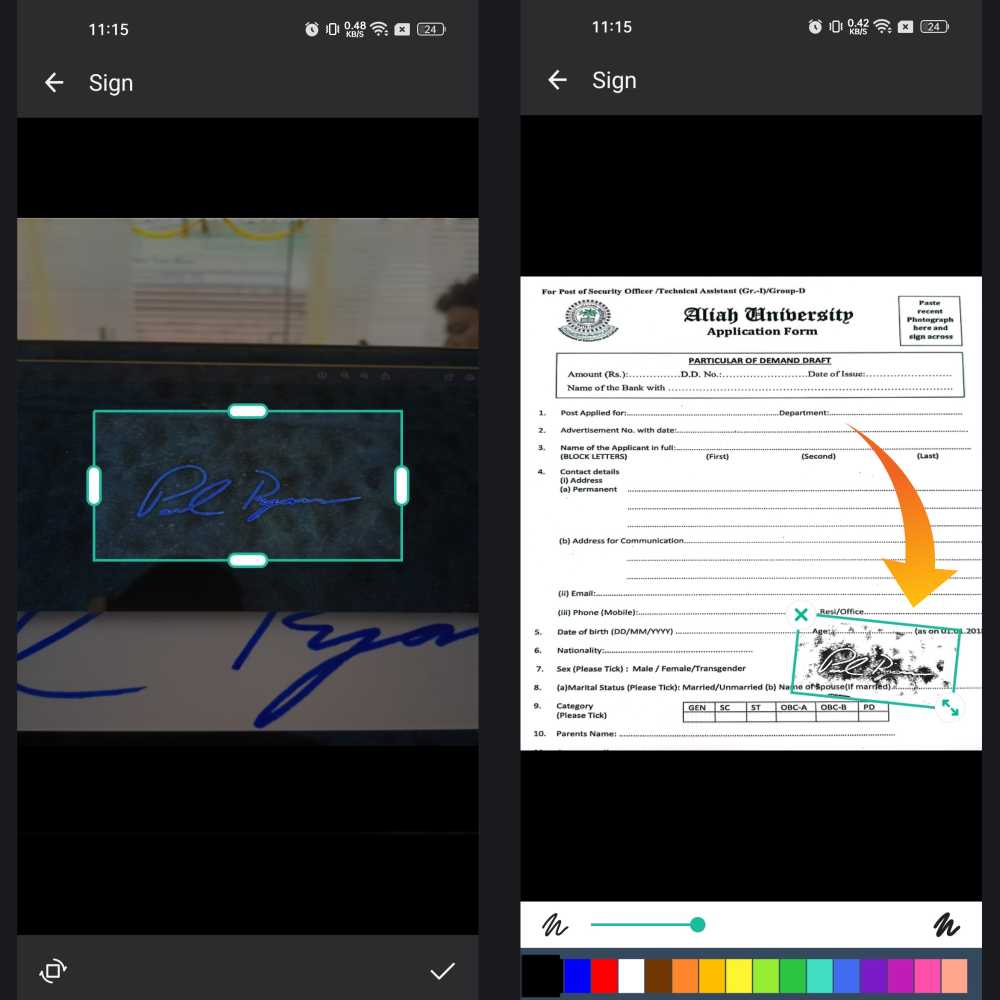
Step 4. Add Signature On Document
- Open the document needed on CamScanner.
- Select the edit or markup tab.
- Then select the signature tab.
- Go through the available options and select your signature.
- Drag your signature onto the document.
- Adjust it in the way you want. Rotate the signature if needed.
- Use the transparency filter if you want to make it look natural.
- Save the document after making the desired changes.
Saving and Sharing
Once you have your digital signature, you can use it anywhere you want. Select the save or done tab to save changes (if any). The signed document will be saved as a PDF or image file. Rename your file for easy access. Tap the share icon to share your file. Choose how you want to share the file. You can share it by email or messaging apps. You can also try cloud storage for smarter data management and easy access. Save the document to your phone’s gallery if feasible. Print the signed document directly from the app if needed.
Tips for a Better Signature
Look through the given tips to make your signatures more professional, clear and natural:
- Use a stylus or a pen for better grip and finer lines.
- Write on a clean background for better clarity.
- Practice your signature a couple of times before saving.
- Adjust and place your signature neatly on the document.
- Slight transparency is great for a natural outlook. Don’t make it too faint.
- Save multiple attempts and select the best one.
Security and Privacy
Some forms of documentation will require advanced authentication. In such situations, be cautious and avoid using CamScanner, as it may not provide the necessary legal security. For important legal contracts, official documents, and government forms, choose apps that offer higher legal and security verification. Examples include apps like DocuSign and Adobe Sign, which provide legal validity and enhanced protection for your documents.
Conclusion
Adding your digital signature to your documents can be tough. CamScanner makes it easy and quick. The basic features and simple interface make the work easier. Great for everyday use and also saves your time, money, and paper. It is advised not to use CamScanner in situations that include the need for legal verifications. In such cases, refer to apps like Adobe Sign and DocuSign.
